Friday, March 29, 2013

Handsewn - The Book & A Little Easter Fun

Recently I was gifted with an Amazon Gift Card and unlike others I NEVAH hold onto a gift card!  I was practically running to my computer to spend it! *LOL*  I had a few things in my cart for awhile so I knew what I wanted...but Amazon in their marketing amazingness, of course had suggestions for me.  One of the suggestions was this...


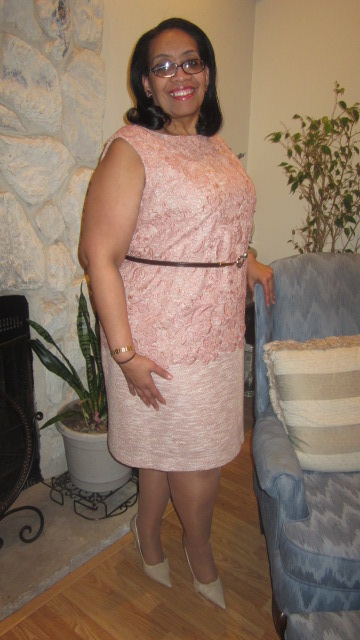
After spending a considerable amount of time hand stitching the lace to my MSN Lace Challenge dress, I was really interested in having a book in my sewing library all about hand stitches.  

Of course, I added this book to the cart.  It arrived Tuesday evening and I've been reading it every evening before bed.  I was way more concerned with the hand stitching techniques for tailoring than for embellishment.  However, after getting through the book, I'm glad that it's such a comprehensive book on hand stitching. Now when I'm questioning how to attach something or how to hand stitch a piece of a garment I have an excellent resource to go to. 

The book is divided into two sections ~ hand sewing for tailoring and hand sewing for embellishment.  Then the author further divides the hand stitches into Skill Levels along with the prerequisite tools and equipment chapter.  I think it's a great book if you want to stitch up samples or if you just want to use it as a reference guide.  It definitely has a place in my sewing library and I know that I'll turn to it again and again for hand stitching.  If you're interested in adding another layer of sewing techniques to your sewing arsenal, I highly recommend purchasing this book.


+ + + + +

It's Easter Weekend and we have a family tradition where the youngest kids come and dye Easter eggs with my Mom.  This year my daughter brought her kids, my sister's son & daughter came and my brother sent his son while his daughter (who I can't believe is 21!) came along to help out.  

Here's a few pics of the fun...


Dyeing the eggs all the grandkids, 
the nieces, nephew & my daughter


Dyed eggs

Easter treats for the kiddies


My babies eating pizza and cupcakes


+ + + + +

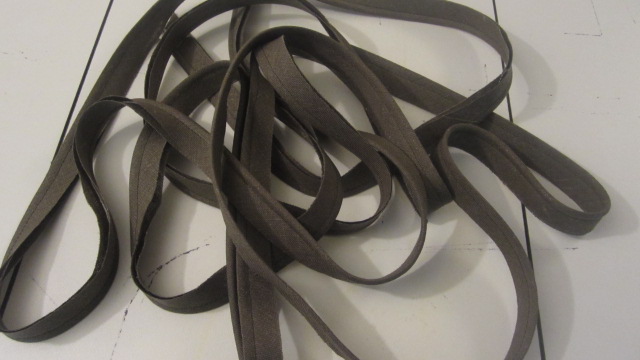
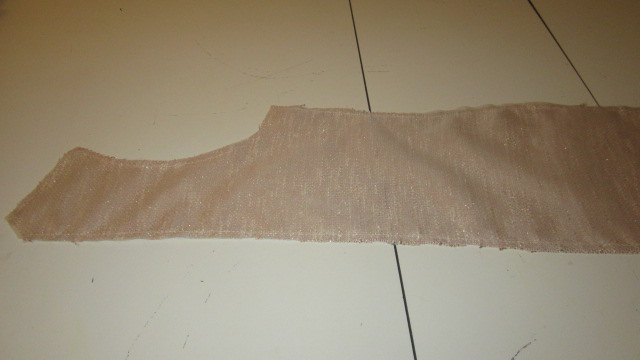
It's been a full two weeks at work...my new boss started last Monday and it's been a lot of long days filled with meetings and transitioning...so I have no desire to sew.  I really just want to veg this weekend and enjoy my family.  The jacket that I was finishing to accompany the dress probably won't be sewn.  I will probably wear a fingertip length beige cardigan with the dress.  Now I know I'm doing a great disservice to the dress but it would be worse to throw together a jacket than to find a substitute...at least in my book.  Things might change tomorrow but I doubt it.

...as always more later!


Tuesday, March 26, 2013

I Love My Stash!

So I'm working on my latest dress and the first thing that hit me was that everything and I mean EVERYTHING was already in the sewing cave.  I didn't have to stop because I needed to purchase anything.  
  • Invisible zipper - check!   
  • Lining - check!  
  • Rayon hem tape - check!  
  • Piping materials - check!  
...and that's what got me...because that means my stash runneth deep if I can get an idea to add some piping to the dress ~ then rummage through a notions drawer to find some bias binding that coordinates with the dress to make the piping.  I'm working with a pretty deep bench ~ to steal a basketball metaphor!

That's why I don't understand when other sewists say they don't stash.  I honestly don't comprehend that concept.  Do you pre-plan your sews?  Make a list and head out to the craft or fabric store to purchase the needed items?  Or horror upon horrors, do you STOP sewing the project because you realize that you're missing something, then head to the store.  Now see I just don't get that!  Just like you, the non-stasher, doesn't understand how I could own all this "stuff" ~ I don't understand stopping in the middle of your project to go out and buy something!

Anyway, that is the chicken and the egg conversation that sewists always seem to have, and not really here nor there.  So why am I particularly thrilled with my stash?  Because I took this avocado linen bias binding...


...and this already made ivory piping...


to make this finished piping...


Now before you start asking why did I use ready made piping in my home made piping, let me 'splain.  I've stashed rat tail in two widths.  But neither of these pieces made the kind of piping that I wanted.  Both fillers were too delicate, floppy and not very stable.  However, when I added the pre-made piping as a filler, I got the firm piping that I wanted.

If I hadn't already owned these pieces, I would have had to go another route or stop until I had the materials.  This people is why I stash!  Three yards of made-by-me piping later, made me a happy sewing camper because this piping coordinates so well with my project!

I'm not going to turn this into a "Do You" or "Don't You" stash post.  I'm just celebrating the breadth and depth of my stash.  


Finally a quick peek at the dress shell on the hanger...


...as always more later!


Sunday, March 24, 2013

Is it Winter or is it Spring?

I'm telling you it's hard to tell here on the East Coast!  The calendar says "Spring"...the weather says "Winter."  They are predicting a snowy/rainy mix here in the Tri-State area for tomorrow morning, right around the time I will have to commute to work...*sigh*  Because of this, it makes it hard to know what to sew...

However, I've decided to go ahead with spring sewing.  I refuse to endorse this weather since I'm confident in the fact that spring will come...some day!  Originally I was going to sew a quickie and I still will make that garment but I just wasn't feeling it yesterday when I went to pull fabric.  


Instead this fabric really called out to me.    It is a French Linen blend vintage floral tapestry purchased last month from Emmaonesock.  I bought this fabric knowing that I wanted to make another version of Butterick 5147 which is sadly now out of print (OOP).

Butterick 5147

I love this dress pattern as much as I love my TNT dress pattern.  It wears easily, looks professional and sews up well in a lot of different fabrics.  I've already made five versions of this dress. This will be the sixth one and I can guarantee that there will be more.  Hey, I really like the dress! *LOL*


I've decided that I just want to sew more than I wanted a quickie.  A quickie meant that I had to finish it today.  Just sewing means that I can meander along and enjoy the process...because it's not like I'm going to be able to wear this dress anytime soon, anyway.

Friday is Good Friday and my office is closed.  So I'll work on the coordinating jacket to The Lace Dress, Friday and Saturday.  All the pieces are all cut out, it just needs to be sewn together.  I can get that accomplished in two days and probably finish up whatever isn't completed on this dress, too.

Those are my plans for today, to just sew...

...as always more later!


Saturday, March 23, 2013

Spring is coming...

Yes, the spring bug has finally bitten me! As much as I want to sew more winter things, my heart isn't in it. And once again my thoughts are turning to a spring coat...who knows if I'll actually make one. I seem to come up with a million reasons why I can't take the time and sew one...but I would love to use this new pattern from Vogue... 


Vogue 8884

...to make a spring topper from a black heavyweight ponte knit from the collection:


I have everything too - fabric, lining, buttons so I really should get on that!  We'll see!

Now that I have the sewing cave there is no changing over of the fabric, but I will be moving some pieces around and changing up what I'm going to make.  Oddly enough, I don't have a list yet. I just know that it's time to sew spring ~ the birds are singing in the mornings when I leave and it's light still when I'm headed home. Spring is coming and I need to get ready!  Besides, I have plenty of fall/winter gear to wear until it gets warmer.

On another note, I got a new boss at work this week so I won't be going on a big vacation this year.  I knew about the change earlier in the year which was part of the reason that I took so many vacation days in January and February.  It will just make work easier if I'm around.  


So since I have no vacation plans, I bought concert tickets to the Justin Timberlake/JayZ "Legends of the Summer" tour for me, my daughter and her friend.  I haven't been to a concert in years people so I'm kinda excited to see this one!  I listened to the new CD all last weekend (it was streaming free on iTunes) while working on "The Lace Dress" and downloaded it first thing Tuesday morning!  Geeky I know but I love that little 'Nsync boy!  *LOL*  So expect to hear more about this as it gets closer to the date! 

I've also developed an obsession with Roksanda Ilincic's designs.  I love, love, love her Spring 2013 line and even though I made some basics awhile back instead of interpreting a dress that was burning a hole in my brain ~ expect to see interpretations of several of her dresses come from my sewing machine this spring/summer season.


The original inspiration

Love this cardi with the color blocked band

Love the unusual piecing on this one
with the pop of orange!

Aren't the cuffs awesome?

Well those are my ramblings for today...

...as always more later!


Thursday, March 21, 2013

MSN Lace Challenge - The Reveal

Here is the original Oscar de la Renta dress...


Here is my version of the dress...


The original dress cost $2,990.00.  The materials for mine cost approximately $350.  This wasn't the cheapest designer interpretation I've made but I think it was worth every penny!

The components ~
Pattern ~
TNT dress pattern

Fabrics ~
2 yards of lightweight wool tweed from Mood
2 yards of guipure lace from Mood
2.5 yards of silk charmeuse from Mood

Notions ~
beige silk organza
22" peach invisible zipper
ltwt. fusible interfacing
1 1/2 yards of lace for lining hem
rayon seam binding 

All of the construction details can be found in these posts.  As I stated previously, this was a very involved sew and actually involved more hand sewing than machine sewing.  However, the journey was worth it.  I've cut out all of the pieces for the jacket that I want to wear with this dress on Easter Sunday.  It will be the perfect compliment to the dress so expect to read more about the jacket's construction.

A few more pics...


Dress with belt - wanted to see if it would work for me!
...mmmmm, no!  *LOL*


At one point during the picture taking we were getting junk...just couldn't get the lace to play well...so we took some up close pictures of different portions of the dress. Here I am in pieces - bodice first, middle of the dress (notice I don't say waistline - hahahaha!) and the skirt and hemline of the dress.


...and a back shot...


For a closing shot, here is picture of the purse and shoes that I will wear with the Easter combo...haven't decided if I will wear a hat or not...


...as always more later!


Wednesday, March 20, 2013

One more time...

This is just a quick reminder that I'd like you to join me at Mood this Saturday at 11 am.  Since I'll be talking about how to use your TNT patterns in many different ways, I'll be bringing along a few of my favorite dresses made from my TNT dress pattern.

If you'd like to see The Chanel Dress, The Linen Erdem Dress, The Leather & Ponte Dress and of course, The Lace Oscar Dress, I will have them with me.  There are still spots available in the class, so if you're interested you can register here.

Register and come on over to Mood on Saturday.  We'll have a good time, I promise!

...as always more later!


Monday, March 18, 2013

A Sewing Machine Story

So if I tell you a story, will you tell me one back?  See it's like this ~ I started sewing on a Sears generic machine.  This was back in the day when all department stores had a sewing section.  Some stores like Sears carried not only fabric and supplies but they also carried sewing machines.  Other department stores like Macy's only had a fabric department.  

I received my first sewing machine for Christmas at 11 - the green cast iron sewing machine that came in its own desk and only sewed straight stitches, back & forth and was so up-to-date because it had a zig zag stitch.  Don't laugh children, I was cutting edge!

I've had several sewing machines since then.  In my college dorm room I had a Singer that I bought on installment payments from the Singer store in the mall by my campus.  Then came a $99 Brother sewing machine that I purchased from JC Penneys.  When my kids were 10 & 11, I upgraded to a Viking that I paid on weekly at the sewing machine dealership before I could finally bring it home.  Sadly this one met a horrific end when my apartment at the time went up in flames.

After that tragedy (no one was hurt but my sewing machine, serger, a boatload of fabric and my living room set were all destroyed) I decided that with the money we received that I was buying my dream sewing machine - a Janome 8000.  I bought it used because by then Janome had moved on to bigger and better things but I loved this machine and have only sewn with Janomes as my prime sewing machine since.  That's a picture of my latest baby above!

So that's my sewing machine story.  Will you tell me yours?  Of course I have a few questions to assist with the story telling...

  1. What brand of sewing machine are you currently sewing on?
  2. Was that the first sewing machine you used from this brand?  
  3. Are you still sewing on that brand of sewing machine?
  4. If not, why not?  
  5. If so, why?
  6. Finally, if you switched brands, why?

These are my questions of the day.  Talk to me.  I'm very interested in hearing your Sewing Machine Story!

BTW, check out "The Lace Dress" on the MSN blog tomorrow.

...as always more later!


MSN Lace Challenge ~ Applying the Lace & Last Thoughts

This will be the last installment in the construction of this dress.  Because the lace has been totally applied, the lining and hem are done - so pics will be taken tonight. Then the big reveal will be on the MSN Blog Tuesday.

General Information...
The reason I've given this part of the construction it's own blog post is because it's the most prominent aspect of the dress and applying the lace was a very involved process. First it took 25-30 hours of hand stitching to get the lace applied to the top of the dress.  AND there is a lot of hand stitching in the dress...so much so that it has changed the weight of the dress. As each piece of lace was sewn to the dress, it got heavier and heavier.

Now I'm not a couture sewist or a tailor. I'm just a sewing enthusiast who enjoys the process and loves to create. Anyone could have made this dress because I started with my TNT dress pattern which had already been fitted to me. When I took the fit application out of the equation, all that was left was sewing techniques...all of which are pretty simple, just time consuming. I truly believe anyone from an advanced beginner to an advanced sewist could make this dress. It just took a lot of time and the willingness to take my time and use a needle and thread more than my sewing machine.

Lace Application...
Besides the fact that it took 25-30 hours to apply the lace, there were a few things I was grateful for and here's some more info on the application of the lace and building the dress...

1.  The Susan Khaljie class that I took at Mood NYC was a lifesaver.  There were so many little tips that she shared about applying lace to a garment that really helped me get this dress finished.  If you get an opportunity to take this class with her, I highly recommend it.

2.  The silk organza was the best foundation to add to the dress. Not only was it a great underlining for the dress but it was the perfect base for stitching the lace into.  It added body and structure to the wool tweed and guipure lace.  It was the second wisest decision I made when constructing the dress.

3.  I kept four needles threaded at all times.  It made the hand stitching go faster.  It also didn't seem as overwhelming when I didn't have to constantly thread a needle and helped me get into a rhythm.  Also at the end of each sewing session, I made sure the four needles were re-threaded and waiting for the next sew.

4. When I went to add the lace to the back of the dress, I realized that I'd attached the lace on the wrong side to the front.  The wrong side had no luster and was a more matte color/finish and I was fine with that.  I would have been a big shiny mess if I'd used the "right" side!

5.  The lace was applied with basting stitches in a bright neon color at the neckline and the side or back seams so that I would know where to start and stop stitching.  I removed the stitching at the sides and the back once the lace was all stitched down.  It wasn't removed from the neckline because it would be encased in the seamline and at that point I was just too lazy to remove something that didn't need to go.

6.  Putting the lace on the front was the easiest part.  I draped it over the front and smoothed it out over the darts, left extra around the neckline and the armholes and basted it down there.


7.  Getting the lace on the back was a little more involved because I had to match the lace at the hemline, at the sides and the zipper.  Now I understand why designers use a lapped zipper instead of an invisible zipper ~ easier to match and no worries about the lace getting caught in the zipper tape.


8.  When I started stitching the lace to the dress, I started at the bottom by stitching the edge flat first.  Then I stitched rows from one side to the other side sewing from the bottom to the top.  It made it easier to figure out where to stop and start on the stitching since it took me an entire week of sewing (even some evenings after work) to get the lace stitched down.  


9.  About halfway through hand stitching each piece, I steam pressed the piece.  Now in Sandra Betzina's, More Fabric Savvy, she says to cover the lace and then to hover 1/2" above the fabric and steam.  Then steam and pat flat, never touch the lace with the iron.  Okay I tried that and honestly it looked better when I lightly pressed the lace.  I'm stressing lightly pressing the uncovered lace because I got a better press/finish that way.  Maybe it's because I'm using the wrong side of the lace.  I don't know if this technique would have worked if I had used the shinier side of the lace.

10.  I used my normal technique of adding bias binding to the armholes because I find that the dress wears better for me with this technique.  This is a personal preference not a sewing rule.  Now for this dress I didn't want to use another fabric for the bias binding.  So I made some bias binding from the silk charmeuse so that everything matched inside the dress.  But as you know silk charmeuse is thin and can stretch out of shape so I added a lightweight fusible interfacing to the fabric prior to cutting it into strips.  Then I applied it to the dress' armholes.


11.  Because I'd already gone all the way with the construction, I also added a lace trim to the hem of the lining and of course, rayon seam binding to the fashion fabric's hemline.  The dress deserved it.


12.  Finally, the designer dress has the lace edging at the neckline and armholes.  Originally I was going to replicate that...now I don't care.  I like the clean neckline and armholes on my dress and I'm going with that.

Last thoughts...
Lace is H-U-G-E right now.  It can be very dressy like these Tadashi Shoji evening/cocktail dresses or everyday like these plus size dresses from Macy's. Lace has been made into tops, pants and shorts...just everything.  So including some in one of your new summer garments is a must.  You don't need to get as involved as I did, but add something lacy to your spring/summer wardrobe...it will be worth it!

I hope you made it this far because there's alot of instructions above, but just in case someone wants to walk in my shoes, I've left you a roadmap!   Like I said earlier next up is the reveal...

But can I tell you that my next two pieces are going to be easy schmezy!  I've already picked them out cause I need some quickies after all of this involved sewing.  Then I will work on the jacket/coat to wear over the dress Easter Sunday.  I've made the pattern several times before so I'll be able to put it together quickly.

...as always more later!


Saturday, March 16, 2013

MSN Lace Challenge - Still Not Done!!!!

This lace dress has turned into an epic project!  I've spent 8 hours today working on it and it's still not finished...

Let's go to the photo evidence...

The lace hand stitched to the front of the dress

One side of the back hand stitched down

My daughter showed up earlier tonight to see if I was ready to take pictures...ummmm NO!  At that point I was just sewing the lining in...and for a hot minute I truly thought of taking some short cuts and finishing the dress up so that I could get the pics taken...

But then I came to my senses...let me tell you why.  

  • See I have between 25-30 hours of hand stitching in this dress to make the lace, wool tweed and silk organza underlining act as one piece.  
  • I've used both my February and March Mood allowances for the fabric, as well as about $120 of my own money.  
  • Yes, this does include the materials for the coat too but peoples there is a small fortune invested in this project.  So I'm only doing my best sewing.

On the honest tip, this project has challenged me because it's made me sew outside of my comfort zone.  I usually sew to have clothes so I don't always use involved techniques - mostly I just sew.  Hey I like clothes and I like having a lot of them.  I get bored wearing the same thing over and over and since I have the ability to make as many as I like, I do.  Call it the fulfillment of a childhood dream, or greedy or consumerism, whatever...  

However this project didn't NEED to be this involved or epic I could have chosen a simpler lace project...but going along with my intent of using this opportunity as a Mood blogger to stretch my sewing skills and to sew as many different types of fabric as I can, I went there.  

So my daughter went home and no pictures were taken.  She made me take a break and have dinner with her.  I'd been in the sewing cave since 10 am and had been sewing non-stop. She encouraged me to keep working on the dress without taking any shortcuts!  Love that child!!!

She won't be available for pics tomorrow since it's The Little Prince's fourth birthday!  Hard to believe that he's four already!!!


See those toy cars in both pictures, 
he goes nowhere without them!

I've been excused from the birthday party (Thank God! - because a room full of four year olds and younger at the bouncy place is not my idea of fun! *LOL*) so I will take my time and finish the dress.  I'm actually looking forward to sewing the jacket because it's going to be a breeze compared to the dress.

Photo shoot will be Monday evening allowing me to just make my deadline for publishing on the MSN site Tuesday.  I swear next month I'm sewing something easy!  *LOL* I need a break from epic projects!!!

A few more pics...

Inside showing the hand stitching and the silk organza underlining

Full shot of the front stitched together

Trimming the lace around the 
invisible zipper in the back


...as always more later!


Wednesday, March 13, 2013

Join Me @ Mood


Click on the picture to enlarge it
for all of the details.

Register for the class here!

Sunday, March 10, 2013

MSN Lace Challenge - The Construction

It took me a while to get started on this even though I know there's a ton of work involved in making the dress and I do have a deadline.  Lately I've noticed that when I have a time frame to complete something that I drag my feet getting started.  *sigh*  You would think that I would have been working on this first thing Saturday morning...yeah, right.  Let's try it was closer to midnight when I finally got into working on this dress.

Let's start with the pieces...
I decided to underline the wool tweed with silk organza since the wool tweed is a loosely woven fabric. So there are four layers to this dress...

* wool tweed base fabric
* silk organza underlining
* silk charmeuse lining 
* guipure lace

After I cut everything but the lining out, I machine basted the silk organza to the dress pieces.  I went back and forth over whether I should hand baste the silk organza to the wool tweed but finally realized that I would never be finished with the dress in time if I hand basted the two pieces together. Especially since I'm going to serge finish the pieces because the tweed is starting to ravel like the dickens. I've decided that I'm going for well constructed not couture sewn.

Then I sewed the dress together.  The challenging part now is getting the lace stitched to the front of the dress so that it's flat...which involves a lot of hand stitching...and a lot of concern.  Gawd, why do I do this to myself? So I'm watching television and hand stitching and praying.  Well at least Jesus will be happy that I'm staying in constant contact while I attempt to make this dress work...

A few photos of the dress in progress...


Back piece with silk organza underlining basted together

Back piece with seaming and invisible zipper installed

Tweed dress base on Lulu

Pinning the lace to the dress

Dress on the hanger

Basting the lace onto the front of the dress


...as always more later!


LinkWithin

Related Posts with Thumbnails