Thursday, February 28, 2013

59 Days into Twenty Thirteen

...and I've sewn an additional four pieces bringing my total so far to 10 newly made pieces...along with remaking two pair of black pants...so I guess that's really 12 pieces since I practically made those pants from scratch.

Two dresses, a skirt and a pair of pants...all good wardrobe builders.  Not a bad total for the month but honestly since I had a five day holiday this past month, I'm disappointed by my output.  Okay, okay I know I'm obsessed but at this point in my life, I can be obsessed.  My children are grown so I have the time to wallow in my hobby...

Anyway, let's recap ~

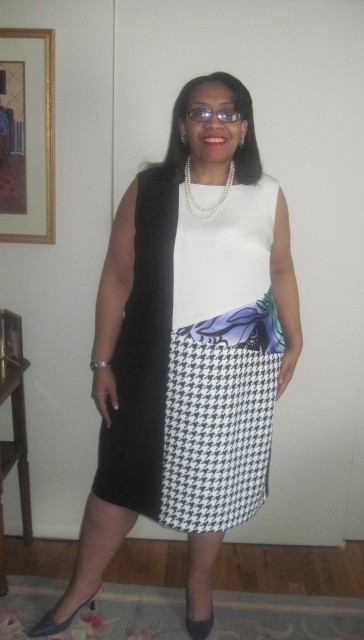
The Butterick 5679 Print Blocked Dress
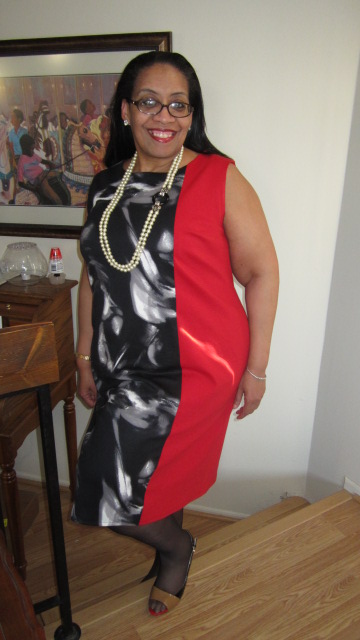

The CK Dress


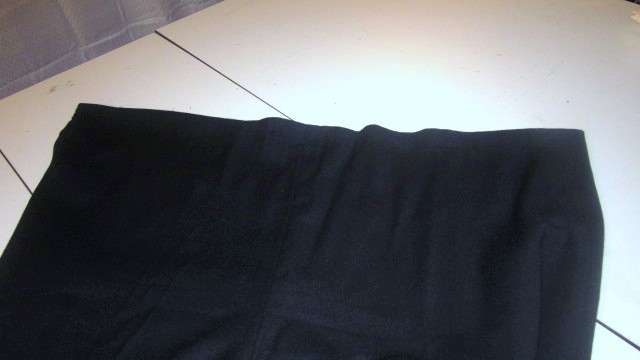
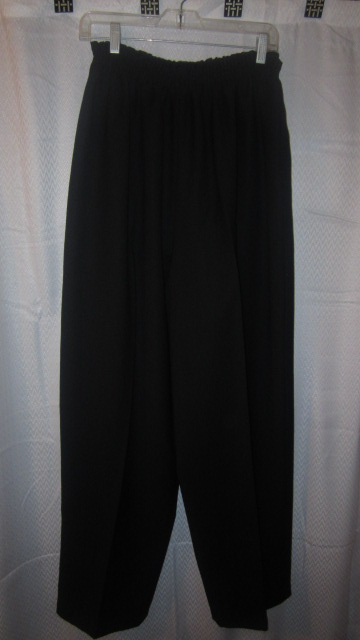
A pair of grey wool crepe lined pants


An Emerald Green Pleather Skirt


...another thing that happened is this...


The Mood Sewing Network got a shout-out in
the April/May 2013 issue of Threads*


The month was only 28 days long and it was jam packed.  Since I'm working on my Easter Dress which is also my Mood project for March...and it's kinda involved...be prepared to be bored during the next couple of weeks as I go on and on and on about making it! *smile*

...as always more later!


*Also check out my girl Cennetta and the mention of the Haute Couture's 50th Anniversary in the same section of Threads!


Tuesday, February 26, 2013

An Emerald Leather Skirt for a Trip to Oz

Faux leather is off the beaten path in Mood.  It's on the third floor, way in the back, behind all of the scrumptious designer boucles.  The Saturday that I was in Mood NYC, I was back there all alone!  But the treasures people, the treasures that are in that section are mind-blowing ~ well at least to a fabric junkie like me!  As I was pulling out bolt after bolt, I stumbled upon this goodness...


...and I knew right away what it should be!  It was love at first sight, really it was! So Todd helped me get it to the cutting table where a conversation ensued about what the fabric should be called.  Now this was a most interesting conversation that involved Shaft & Superfly, whether the fabric was a vinyl, a leatherette, pleather or a faux leather.  Somehow we even managed to get the 70s drug dealers in there, yeah I think that's how Shaft & Superfly showed up!


I've used this pattern before and it's a pretty easy sew but I did add a degree of difficulty by making it up in the pleather.  It's Simplicity 5914 and one of my favorite skirt patterns.  At one point I thought about studding the seams but that was just a little tooooo edgy for my day job. Since I primarily sew for my day job, I really want to be able to wear this to work.  So I scaled it back but I really like this!

A few tips for sewing with pleather ~
  • Only pin the fabric in the side seams because the pins will leave marks in the fabric...and I used them sparingly so that I wouldn't have any issues.
  • You don't need to finish the seams because the pleather won't fray.
  • Use the proper needle for this project.  I started with a fresh size 90 stretch Schmetz needle
  • Use the correct sewing foot.  You can use a teflon foot to insure that both pieces of fabric move together and don't drag.  However, in this instance because the fabric was felt backed I used a regular zig zag foot.
  • When pressing the pleather, use a good pressing cloth, a lower setting on your iron and a clapper to make sure the seams lay flat.  
  • I also finger pressed the seams open prior to pressing.  It made getting the curves open and to lay flat easier.
  • Only press on the wrong side of the fabric
  • Also, Sandra Betzina does a great segment on sewing with Faux Leather in her book, More Fabric Savvy.  Of course I checked it after I had already started to work with my fabric!
This skirt is my on trend dream.  Pleather and emerald green are both hot for fall.  I've managed to incorporate both in one garment.  If you're interested in using some pleather, it's really fun to use for a garment or to incorporate as embellishments, you can find a great selection on Mood online here.


Some stats ~
Fabric and pattern listed above.

Notions ~
Rayon lining from the collection
9" invisible green zipper

Construction Details ~
I lined the skirt in a heavier rayon lining that I had in my collection because if I left the skirt unlined the felt backing would have caught on my stockings.  Also adding the lining gave the skirt a little heft something else I wanted.  

There isn't a hem on the skirt.  Since the fabric won't fray, I just left the hemline with a clean cut finish.  

Adding an invisible zipper was easier than I thought and gave the seam a clean finish which was nice on the pleather skirt.


I'm wearing it kinda conservatively ~ well as conservatively as you can wear a pleather skirt!  It's for Fashion Fridays at work ~ when the staff dresses down a little and I dress a little fashion forward.  It's an interesting on trend addition to my wardrobe.


This is how I will wear it out with friends...


...or with a cardigan and a tank top...


Final thoughts ~
I don't sew many casual garments but this pleather skirt will probably see more time out and about for social events than at work.  It was a fun sew and something different from what I normally make. I really like how the skirt drapes in the back. It also has a closer fit than my skirts usually do because this pleather doesn't grow and it wrinkles like heck...

Now how does this fit into my basics declaration, well it doesn't...but it wasn't meant to.  This is my Mood Project for February. One of my personal goals for my monthly Mood garment is to use fabrics that I wouldn't normally use. Also, to step outside my comfort zone to sew a challenging garment because I don't want to do the same old, same old.  This opportunity allows me to challenge myself, to use fabrics from all sections of the store and to add to my creative journey.  This skirt is the exception to my basics rule but it is kinda funky and fun, isn't it?

...as always more later!


Sunday, February 24, 2013

Remaking A Pair of Pants

Let's recap ~

Last winter was mild.  So maybe I wore pants two or three times.  Because as we all know, I prefer wearing a dress.  This winter, not so mild.  So I had to go into my pants collection, which I hadn't looked at for two seasons.  I was hoping that this would be a mild winter too.  Of course it isn't and now I need to stay warm.  After carefully examining them, two pair needed the linings replaced.  One pair needed the elastic removed from the waistline and a new one inserted. Finally a couple pairs were sent to the dry cleaners. That left several pairs in rotation so I needed to change this situation.

As stated previously, I've made five pair of lined black wool crepe pants ~ one pair of them are pictured on the left. These became a staple in my winter wardrobe because they provide such a great foundation for adding tops, twinsets, sweaters to complete an outfit.  

There were two pairs of black wool crepe pants that needed to be repaired.  The fashion fabric was fine - no tears, rips or stains so I wanted to preserve the fabric. The lining in one pair was in total shreds and the other pair looked like this...

Shot of the inner thigh shredding

Close up of the shredded lining in the thigh area

I could cut out new linings and add them to the pants or I could change my lining technique for something that would last a little longer.  I'm going with changing my lining technique so that I won't have to repair these as often.  Now, do I flat line or underline?

Lining versus underlining

"A lining is a complete separate "garment" attached to the inside and secured at one or more places such as the waist or the hem.  An underlining is an additional layer that is added to each part of the garment before it is constructed.  On a lined garment, the seams will be concealed, but on an underlined garment they will be visible."

~ from the Lining Chapter in The Dressmaker's Technique Bible

Flat Lining Techniques were discussed in this blog post on pants or can be found in Threads Issue #42, page 58.  If you have the Threads Magazine Archive DVD, the article gives you a step by step description on how to flat line a garment. There is also a great article about underlining in Threads Issue #68, page 37 written by Sandra Betzina.

First let me share the items I'll use to remake the pants...

Stretch elastic, black bemberg lining, Hug Snug Seam Tape

As I mentioned previously, after wearing a pair of flat lined pants versus wearing the underlined pair, I'd rather wear the underlined pairs because they are less irritating to my inner thighs.  Back to the deconstruction...

Reconstructing the pants...

First the lining is carefully cut out.  It's the easiest & fastest way to get it out of the pants.  I toss this.  I guess it could be saved for future projects but why?  So in the garbage it goes.

Removing the lining by cutting it out

Old lining trashed

Next the elastic comes off. Now this is a process - its kinda involved getting five rows of stitching out, especially in black fabric.  I normally do this while watching a movie/tv show so that I don't mind the time it takes to remove it.


Then I rip the pants apart and iron the fabric flat...holding onto the rayon bemberg tape from the hemline to reuse.

Finally I lay the front and back pattern pieces on the lining material and cut new pattern pieces.  I will be honest here, sewing books advise against using this technique for a variety of reasons.  Me, I use this technique all the time and have no problems BUT I feel it's prudent to tell you that it's not the accepted technique.


After the lining pieces are cut out, I pin the lining and fashion fabric together. The pieces are taken to the serger and serged together.


Then the pants are reassembled with the fabric and lining acting as one. 


This is a hanger shot to show the finished pair of pants. However, I found a great piece of fabric in the collection so I'm going to make a quick cardigan to go with my remade pants.  I'll wear it with this white sleeveless blouse that I made last winter.


Hopefully this process was helpful to someone!  I can tell you that this is the "lining" method I will be using going forward for my pants/trousers.  And now that I have two remade pairs of pants plus the new gray pair in my wardrobe, I'm moving onto something else. 

...as always more later!


Friday, February 22, 2013

"Carolyn Inspired" by Denise...

I was thrilled when I opened my mailbox last night and discovered this...


Front view


Rear view

Yes, that's Denise aka "Andsewitgoes" modeling her Carolyn Inspired Top.  I think Denise explains it best...

I swooooned over your Erdem Inspired Dress post. So much so that I am sending you my 'Carolyn Inspired Top'.  

A couple of notes about the top.  There were many firsts for me:
  • I mixed a woven with a knit.
  • The front being the woven and the sleeves and back from the black knit.  I was worried that the knit would stretch so I used strips of interfacing to stabilize the side seams. Another first for me.
  • I also used the interfacing to stabilize the shoulders (This was a tip I learned from you!)
  • Another first was mixing two patterns. Most of it is my TNT top: Buttterick B4290 but I wanted a modern take on it so I used the back pattern piece to elongate and curve the back hem...
I love mixing patterns and got the confidence from reading all your wonderful posts.  Thanks for all the inspiration!

********************** 

Denise you are so welcome!  And the top is gorgeous!  The offer is open to everyone who reads my blog.  If you are inspired to sew something by a garment I've made, please feel free to leave a link in the comments or forward it to me. I will gladly feature you here and/or link back to your own blog!
I love when we as a sewing community inspire each other to achieve greater sewing feats and to improve our craft!

The pants post will be up next...

...as always more later

Wednesday, February 20, 2013

The last pair of pants in the City in Winter Collection

I saw this image in an email and the idea of the longer cardigan, white shirt and a pair of pants resonated with me.  As I said in my last post, I didn't have much of a sewing mojo until I decided to resolve the basics issue in my wardrobe.  So this idea touched my creative nerve and brought my sewing mojo roaring back...on the last day and a half of my sewing vacay!  *LOL*

There is nothing new in the construction of these pants.  I started with my TNT pattern...so for all of you looking for pant fitting info., I have none to offer in this post.  I started working on this pants pattern almost 15 years ago and in the interim I've enlarged it to fit my growing abdomen/behind, changed the size of the legs and added length as needed.

I did add a half inch to each side of the front pieces only.  Some days I need a little extra in the abdomen and some days I don't. But I'd rather my pants have a more trouser fit than a pants fit...me and tight aren't besties like that!  I also added an inch to the hemline because I plan on wearing higher heels with these pants (but after seeing the pics, I think I'm gonna re-hem them a little shorter). 

Finally I lined them by serging the lining to the fashion fabric and then sewing the lined fashion fabric as one piece.  I finally settled on this application for lining pants for several reasons.

1.  I used the flat lining technique on a pair of pants two years ago.  I wear the pants but only when it's really cold and when I'm pushed up against the wall. By the end of the day that seam starts to irritate the heck out of my inner thighs.  I don't experience this with the serged seam.

2.  I haven't experienced lining failure since I started using this lining technique. Seriously!  It's probably because the two fabrics no longer work against each other.

3.  I'm tired of remaking pants.  My linings are shredding right at the inner thighs and I don't have this problem when the lining is serged to the fashion fabric.

Also, I love the heft the fabric has once the lining is attached directly to the fabric.  The pants feel weighter which is what I want in a pair of winter pants.  Don't forget that I wear elastic waist pants.  They just work for me and I'm now unrepentant about that fact!  *LOL*


Me attempting to "model" like the ad!
Why did my daughter think this was a good idea ~ LOL!

One more thing...I wear trousers and not pants.  Personally I abhor when pants cup the buttocks and give me a full view of what you're working with.  I like the look of trousers...where the pants fit the buttocks but then gently flow into the legs no cupping involved.  And for one time only...never to be seen again...I'm including a picture of the buttocks on my pants so you can see what I mean.


Lord have mercy can't believe I'm sharing this view with you!  *LOL*

I'm wearing these trousers with the cardigan which was the starting piece for the City in Winter Collection.  The cardigan is also the bridging piece bringing the brown and the gray pieces together. So there are now just two pieces left to finish in the City in Winter Collection...a skirt and a jacket from this gray wool crepe.  The two dresses and blouse are going away.  I have more than enough pieces in this collection to coordinate with each other so I'm calling it done when these last two pieces are sewn.

...more views...


See nothing exciting, sexy or slimming about these pants but very much needed in this weather!  BTW, based upon your comments, which I sooooo appreciate, my next post will be all about taking apart a pair of sewn-by-me pants and remaking them.

...as always more later!


Monday, February 18, 2013

At the end of a five day holiday...

I didn't accomplish as much sewing as I wanted because somewhere between going to bed on Wednesday night and waking up on Thursday morning my sewing mojo went missing.  When it didn't show up the first day I thought it would arrive fashionably late on Friday.  

Friday rolled around and no mojo and absolutely no desire to sew anything on my list.  Which was pretty upsetting since I'd spent quite a bit of time thinking up that list, dreaming on that list and working out sewing directions for the pieces on that list. Hopefully they will come out of the dream state and into the real world...but at this point who knows?!

While I was wondering where my mojo had gone, I started to question the items on my "To Sew" list.  Because seriously, doesn't this Roksana Ilincic dress...


...look like this Dries van Noten inspired dress that I made a few years ago...


...even my Valentino knock-off is a take-off on the pieced dress.


Why am I continuing to remake the same dress? 

Then I started to question the leather/tweed jacket & dress combo.  Where am I wearing this too?  Would I really wear it to work after all of the hard work that I put into it?  Now I'm sure you're pointing to the leather/ponte dress I recently made. Well I actually wore it with a cardigan and toned down the necklace so it didn't come off as va va voom as it does on the blog.  The studded ponte dress was worn as it was shown with the brown cardigan. See I'm toning down my fashion forwardness for my job.  So did I want to make this combo to chase the fashion dream  or to actually wear?  More questions and still no mojo.

Saturday morning dawned and I decided that maybe I just needed to rest.  Maybe I wasn't suppose to sew this five day weekend.  Sometimes you do just need to sit still and let your inner creative voice speak so that you are being true to yourself and not just chasing an illusion.  Another day with no sewing but a whole lotta babysitting...which leads to Sunday.

After those grandbabies went home and I woke up five hours later, I realized that I needed to concentrate on some boring basics.  I need a couple more pairs of pants.  I need to repair the pants that I've started to dissemble...and it hit me. Basic, boring pieces don't bring glowing compliments in the comment section on your blog. Okay, I'm being real here people...beautiful fantasy garments interpreted into my everyday work life brings many comments and we all know that I'm a comment ho. My sewing list was designed to bring the most comments possible instead of being what I really needed in my wardrobe at this time.

Well dayum, maybe that's why my sewing mojo had fled. I wasn't being true to myself. I was chasing a comment. Are we all squirming now? I know I was when that realization smacked me up side the head! So I pulled out the wool crepe pictured in the last post and promptly started working on a new pair of pants. I also pulled out a rayon blend knit and I'll be making a cardigan too.  Why? Because those are garments I actually need in my closet. To be real, I'm cold and I need pieces that layer to protect me from the cold.

I honestly got a little lost. I fell down that hole that so many sewists fall into...sewing for the life we want instead of the one that we are actually living. Now this doesn't mean that we don't like our lives, it just means that sewing the special & distinguished is so much more fun (and comment producing) than sewing the boring and the basic.

So you will be seeing several posts about pants...making pants...mending pants...the challenges of lining pants for the plus size woman. If you need awe-inspiring, come back in the spring when I go back to sewing amazing dresses and interpreting designer gear because right now it's too dayum cold for that and I need boring, basic pants.

Okay that was my self realization and very candid confession...

...as always more later!


Sunday, February 17, 2013

A Cacaphony of Thoughts...

These are things that have been floating through my mind during this weekend...

  • My sewing list has lost it's appeal ~ so I had no desire to sew from it.
  • Why does a fabric purchase make everything okay?
  • Bought some patterns and pleather trim from the 30% off sitewide sale at Simplicity...
  • President's Day Sale 30% OFF
  • Thanks to Kirsten from Simplicity who responded to my irate email so quickly! GREAT customer service deserves to be recognized!
  • Why does an email from an online fabric store with the word "SALE" in it makes my heart beat faster and have me searching for my credit card?
  • I posted this to Instragram earlier in the five day weekend with this tag, "This view always makes me happy when I hit the sewing cave!"  It's just sooo true!
  • Watched the grandbabies last night instead of sewing. Whew I'm getting old because they wore me out!  When their mother picked them up this morning, I went back to bed for five hours...
  • I cleaned my sewing cave and watched TV for the majority of my time off...yeah, you know I had no desire to sew if I was cleaning the cave!
  • I added up the yards of fabric that I've sewn in January and February - 20.25 yards and even though it's impressive, I've probably added just as many yards to the collection...*sigh*
  • Do you sometimes skip the pretreating phase?  I almost did with this wool crepe but knew the consequences so I pretreated it anyway.
  • Still don't have my new DVD player hooked up and I'm missing it terribly!  Could that also be a contributing factor to my missing sewing mojo?
  • Bought two new sewing books...
  • The Couture Sewing one based upon Marina from Frabjous Couture recommendation because I so appreciate her talent!

Well as you can see from the pic above, the fabric is out of the dryer so it's time to press it and get it to the cutting table while my idea and the desire to sew it is still hot!

...as always more later!


Thursday, February 14, 2013

I've reached that point again...

I'm overwhelmed with scraps!  While I've thought up a temporary solution, I'm throwing them into one of the white baskets I use to dye in, I'm going to need to come up with a permanent solution that doesn't involve throwing the pieces out. These aren't little scraps they're more than a quarter yard of fabric...big enough not to trash, too small to go back onto the fabric shelves.

I sew alot.  Don't laugh I know that's an understatement...but it's rare when I end up with just very small scraps of a fabric that I've used in a project.  Probably because I don't purchase fabric with a plan or if I do I end up using it differently...so scraps, lots of scraps.  These scraps tell my sewing journey for the last 18 months. That's how long I've been sewing in my new sewing room and prior to that everything was ditched.


trashcan beneath the computer table


That last corner of my sewing cave will need to be worked out sooner rather than later. I really feel like I'm wasting space and could use it so much better.  Because short of locking myself in, and sewing for the next three months straight without adding any new fabric to the cave, I'm sure I will continue to add to it.

These were some of the thoughts running through my head during my first day of my five day sewing weekend.  Because instead of sewing, I started with some cleaning in the sewing cave.  The last tub of books were put back onto the shelves and the last bags of fabric were opened and stored away.  Partly because I was tired of them being in the way and partly to stop me from purchasing more fabric. Hey opening a bag and putting away new/old pieces feels like fabric shopping and curbs my natural tendencies ~ hahahaha!  I also unearthed a box of fabric that I knew I had but hadn't really thought about in some time...so that went on the shelves too...and I found this awesome combo that will be used for some early spring sewing:


(a cotton jersey knit & a yellow ponte knit from the collection)


BTW, someone asked if I'd gotten any water in the sewing cave during Hurricane Sandy and the answer is no.  There was a lot of wind...a lot of wind and damage from the wind...we lost power for four days but no excessive rain so no water in the cave.  Plus I'm looking into a battery operated sump pump. It will be tied to the regular sump pump so that if the electricity goes out and we're taking on water, the battery operated sump pump will kick in.  It worked for a neighbor in the complex so that will be a home improvement project for this spring.  Gotta protect that fabric collection!

More randomness...if you liked the fabric used on the front of the Butterick 5679 color blocked dress it is available online at Mood here.


So now I'm trying to decide where to start on my sewing list. I know that I said I was going to start with the DL Jacket & Dress but my day hasn't been as uninterrupted as I originally thought it would be. I had new mattresses delivered so I sat upstairs and waited for them to arrive...can't hear much of the outside world in the sewing cave, so I'm getting a late start.

There will be sewing going on this evening, after dinner out, but I have no idea what just what yet. However, I know it will be something from my list.

...as always more later!


Tuesday, February 12, 2013

Butterick 5679 Color Blocked Dress Final

Okay I know you want to see this on me...so here goes...


A few stats ~
Fabric:
Print ponte knit from Mood NYC Store
Brown ponte knit from the collection - most likely from Fabric Mart

Notions:
A couple of strips of stay tape used in the shoulders
Some stitch witchery used in the hems before they were topstitched

A little more info...
Construction was covered in this previous post.  Adding some solid color to the front along with the belt helped break up the fullness of this dress and made me like it more.


Originally I'd pictured this with the brown cardigan shown above but when I dug the pink cardigan (that's very old ~ like 10 years old!) out and paired it with the dress it took it to another level!  Or as my daughter said, "pink is your friend!"

A few more pics...


Back with belt

Side view - print/solid view

Front w/belt - my least favorite view
I will never wear this dress without a cardigan
to break up the print!

Acting goofy during the photo shoot!

I've taken apart two of the pairs of pants and will work on the repairs over the course of the next two weeks.  Thanks for your suggestions about the pants slip/liner but I'm already wearing a couple of layers (like 4) on the bottom and just don't want to add another one.  So I will repair these pants and make another pair - the grayish ones from the City in Winter Collection - and that should give me enough pants to make it through the rest of the winter!


I'm only working three days this week because my extended President's Day weekend begins on Thursday.  The first project will be the Derek Lam Inspired Jacket and coordinating dress.  I will be home alone for the first two days so I want to take advantage of the fact that there will be no distractions to work on this complicated project.

...as always more later!


Sunday, February 10, 2013

The CK Dress ~ More Print Blocking

First let me remind you of the inspiration dress ~ a Calvin Klein dress that I saw on MyHabit dot com:


The most challenging part of making this dress was insuring that the red piece was on the same side of my body in the front and the back.  Honestly, I kept getting this mixed up in my mind.  I resorted to basting the pieces together to make it work.


Stats:
Fabric ~
Red ponte knit leftover from making The Macy's Dress
Black/white ponte knit from Emmaonesock - recent purchase

Notions ~
Red bemberg lining
black invisible zipper
red bias binding

Construction:
As I stated before, making sure that the red was the same on the back and front was the most important element to me.  So after all of the pattern pieces were made from my TNT dress pattern, I laid them singly upon both pieces of fabric to insure that I achieved the look of the inspiration dress. 

When I basted the dress together, I realized that I'd been unsuccessful in getting the red on the right sides.  So I unpicked and recut the back pieces. This resulted in a totally seamed back.  From what I can tell on my inspiration pic, only the side with the red piece is seamed but that's not how my version ended up.


It really was an easy make after fixing that issue especially since I was using my TNT dress pattern.  Then I dithered over whether or not to add a lining. I finally decided to add it because even though I could wear a slip with the dress, a lining is just better for ease of wearing and longevity.  

A question or two has been asked about what type of lining I add to my ponte dresses and I use rayon bemberg linings in them.  Even though ponte is called a knit, to me it behaves like a woven, so I always use a rayon lining and I've had no problems with the combo.


A few things ~
Like I said previously, I found the original dress on MyHabit dot com. I visit this site everyday because of the daily email I receive from them. They have quite an interesting selection of discounted designer garments from which I get a lot of inspiration.

This dress originally cost $139 so it was probably from one of Calvin Klein's discounted lines.  MyHabit was selling it for $69.  My dress cost me $50 and most of that was for the black & white print knit.

However, since MyHabit offers a limited size range, probably because it's the last of these pieces, of course my size wasn't available.  Who knows if the size was ever offered, because I didn't go looking for other views online.

If you want to make your own version of this dress, I would suggest Vogue 8886.


Even though this dress has a wide neckline, it does already has the piecing in the front and the back that would allow you to get the print blocking/solid color combo that drew me to the designer dress.

Another great thing about this dress is that I didn't need to make a topper for it. I have several cardigans that will work with it, so it was a perfect sew.

Regarding the fabric, I haven't given up on sewing with ponte knits even though I've recently retired several dresses made from it.  See I don't expect everything I make to last forever.  If it did, I would have no need to sew as much as I do. Those dresses survived about three years and I wore them during a period at my job where I was very physical...moving & boxing up things, crawling under desks for telephones, etc...things I no longer do.  I'm sure some of that abuse aided their demise!

A few more pics...


Various looks

Worn with a white blouse for a more casual look

Worn with a black ponte cardigan made years ago

Finally as a closing shot ~ here is a picture of my little helper.  While her brother slept, she kept watch over my daughter (her mother) and myself while we took picture after picture after picture!


...as always more later!


LinkWithin

Related Posts with Thumbnails